Friday 22 February 2019

Creation of a Paw Patrol Paw-ty

In my household, we have a birthday party for the kids every three years. No specific reason why it’s three, just don’t want them to expect a party every year and at the rate we plan the party, we need three years to recuperate. 😁 The other two years we celebrate simply. This year we have a bumper crop, my kids are three and nine.

So I’m sharing some ideas with anyone out there who wants to plan a Paw Patrol party. Originally, I was planning a Woodlands theme party for her but she wanted the pups to come and save Adventure Bay. I must admit, I was initially a little broken hearted but of course I had to acquiesce to what she wanted albeit half heartedly. So in the end, Paw Patrol it was! And it was actually quite a lot of fun as she could identify with all of the characters which makes it a lot more meaningful for her.

This posting will be summarised and succinct. It will be an extremely long post if I were to share on the details of the execution of the party.

We took a couple of months to plan and prepare. We wanted Skye and Everest as the main pups for her party. And we also wanted to limit the budget so almost everything you see was made by us, the dessert table, the doghouses, the treat boxes, the doggie bags etc. We didn’t have many Paw Patrol toys and figurines as they are very expensive here in Singapore and I didn’t want to spend money buying them. Cookies, cupcakes and birthday cake were all home baked as well.  So here’s a first look at the backdrop with the dessert table.
.
My incredibly talented designer husband designed the backdrop and the standees and the emblem and executed the whole thing. The party was a Saturday lunch and we had a dinner engagement on Friday and only came back at 11pm+. So we had to go to the venue to set up the backdrop and dessert table and we only finished at 3am! Woke up the next morning at 7am and continued where we left off. 

Another closer look.

Took a family photo before the paw-ty started.
I like the way we did the emblem behind us on the backdrop, the one with the number 3 and with Skye and Everest on it, it was detachable. We hung it on two hooks suspended from the ceiling so that when we took photos with our friends and family, we were able to bring the emblem down for an Instagram-worthy picture. Here’s what I mean...


We had an elevator going up to the venue of the party so we decided to do a “lookout” that goes up to the party place. 
That was quite the talk of the town. 🤘🏻

Next up, will show you some closeups of the sweet treats we had on the dessert table. We were so busy getting everything ready that I didn’t have time to take more shots of the desserts. So here’s what I did take...

We personalised the doggie bags with the individual names of the children attending the party and placed them with Coco pops which looks like dog food!


If you’ve seen my previous blogs, you might be aware that I have very low confidence when it comes to baking so I can just about muster some basic cupcakes, cookies and a messy cake. 😊 Anything beyond that is beyond me. So I attempted this chocolate cake covered with white buttercream. The hubs so cleverly stuck two chopsticks under Skye's helicopter and I slather it with more buttercream before sticking it into the cake. In case you can't tell what its supposed to be, its snow. 


Love how these cookies turned out! Bought these cookie cutters which made fashioning the emblems of the pups so much easier. Made with fondant. 

The cookie cutters came with a paw print cutter as well so I just baked some cookies with that and used fondant for the pink paws. So easy and cute! The round ones are Oreos covered in milk and white chocolate which can be bought off the shelves and then just use fondant for the paws again.  

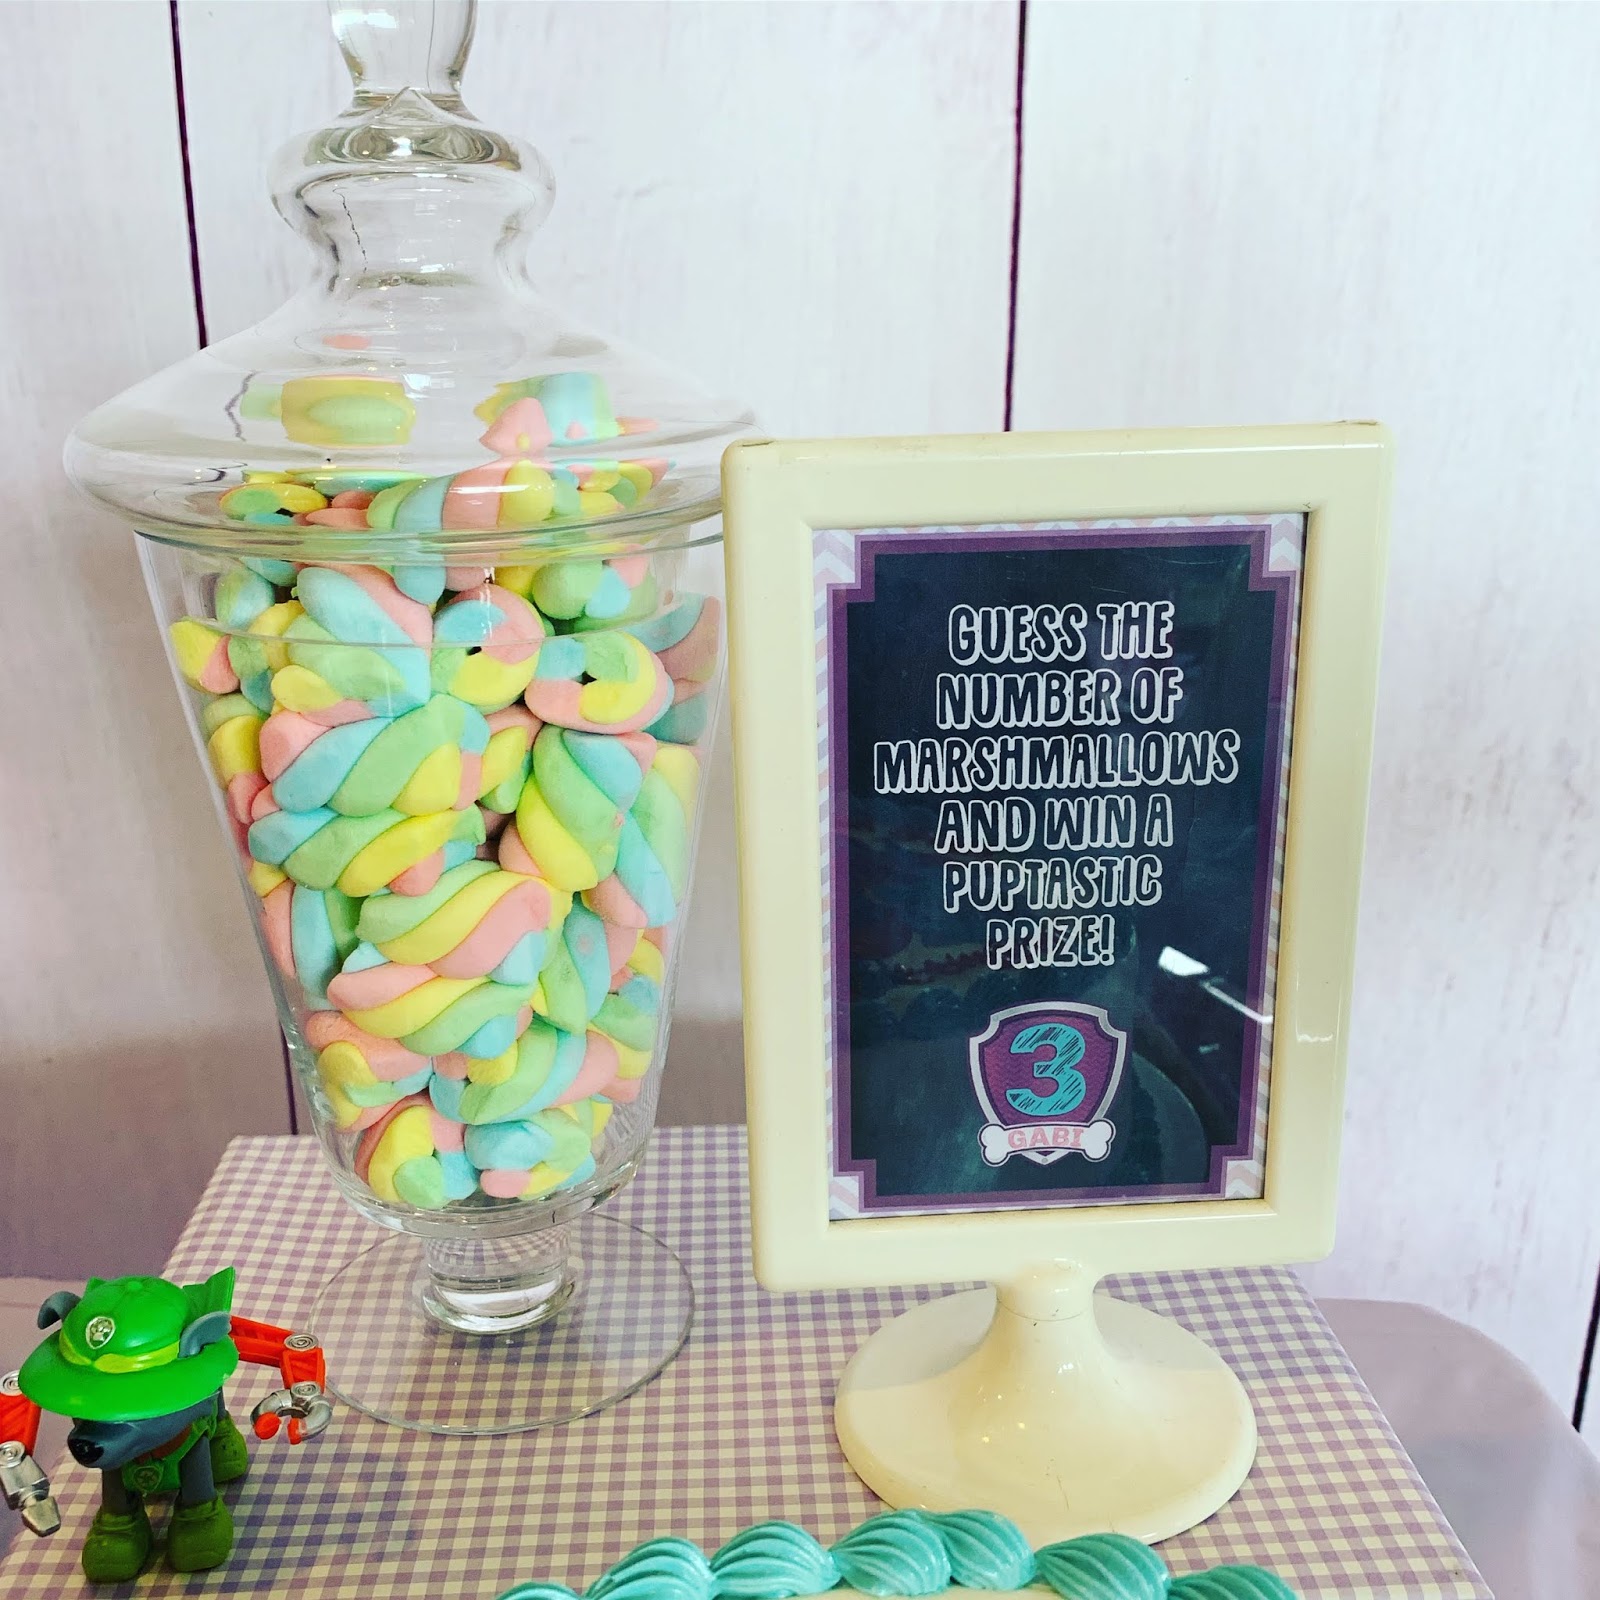
I ended up buying more marshmallows than I needed and decided to have a little fun with them. Stuffed whatever I can into the apothecary jar and asked the guests to guess the number of marshmallows inside. FYI, there were 63.

Thats what I love about scrapbooking. The die cuts can be used beyond a layout or card, it be used to create paw-tastic treat boxes as well. This is the scalloped treat box die from Lawn Fawn. Hubs printed out pictures of Skye and Everest. I used my heart shaped die to cut it out and then layer it on a scalloped heart shaped die with glitter paper

Cupcakes that I baked with Skye and Everest on their transportation fussy cut out.

Ordered these gum ball containers online. Hubs printed the Paw Patrol emblem and I cut it out and stuck it on the containers. Put M&Ms in them.

These were just lollies that I bought and cut out a star shaped picture of Skye and Everest. Folded the box with cardstock and put a styrofoam block inside with shredded tissue paper on top.

Made a doghouse with my die cuts and printed the pups and paste on the side of the doghouse. This one took the most time to cut, fold and put together. Also printed out some paw prints and then fussy cut them out. Folded a box behind the paw print and put some marshmallows in it.

I bought these transparent piping lookalike bags and placed jelly beans, mentos sweets, Hershey's kisses and marshmallows and tied them up with a ribbon with another picture of Skye and Everest. I like how these turned out.

By the end of it all, we were dog-tired but really pleased with how everything had turned out! Happy Birthday Baby G. We woof you!!


Thursday 12 January 2017

Spider party !! (Part 2)

Here's the behind the scenes preparation of my son's 6th year old spider party.  We took weeks of research and discussion to decide on what we wanted to do. We held it at the function room of our condominium which means there was no playground, slides etc and so we also had to think of a couple of games to entertain the kids!

This time, I wanted to try my hand at more baking so had a couple of trial runs with the donuts and chocolate cake beforehand. For those of you who know me, you'd know that I'm no baker, I can whip up a simple basic marble cake or even cookies but that's about as far as my baking skills go.  So I guess I should clarify first that this is not a professional baking blog, just sharing some ideas of organising a party. Hopefully, you are a better baker than I am! :)

So let's start with the invitation card..


Designed by the hub. Spiders can be scary and we were trying to soften the scare impact of his birthday. It is after all a birthday celebration and not a spider exhibition. ;) From here, we determined that the colour theme was going to be blue, purple and black.

Now I have to tell you all about my baking exploration! I wanted to start off with something I was more familiar with, cookies, the question was, how should I decorate the cookies?? I wasn't that good with icing so I wanted to keep it simple. In the end, I just baked some square scalloped shaped cookies and started modelling with fondant instead. 

Helping me with the cookies

Scalloped cookies
Trying out a black fondant spider on parchment paper first
More confident 
Ta-da!
I was pretty pleased with the results! Quite lifelike. The hub was wondering if it was too lifelike and intimidating but the kids were not daunted and ate the entire cookie, spider fondant or not.


Next was donuts. I tried mini baked donuts for the first time. It was easy enough but I had trouble experimenting with the web icing. 


Glazed with melted chocolate
web icing

Wanted a variation of colour so tried melting white chocolate but somehow, it didn't work. I wasted 3 batches of white chocolate buttons but it wasn't a smooth texture as you can see from the picture above. So I had to keep it mostly to milk chocolate.

Using a Wilton tip no.1

Overall, the donuts weren't very successful but it's ok. The kids didn't notice anything amiss. It tasted good. I baked and iced the donuts the night before the party so had to stack them between parchment paper but the next morning, I could see that the icing was "squashed" and "flattened". maybe some of you can give me some tips here.. :)

Ok, lets go on to something more cheerful! Cupcakes! 


Again, the cupcakes were easy enough to bake. I had to think how to embellish it. So I ended up doing this ...
I wanted it to look like spikes. Initially, they looked more like flowers (you can see from the picture above, the ones in front) than spikes lol as I was pushing the icing into the middle rather than pulling it out but it got better with more practice :)


Once you add those eye candies onto the cupcake, it immediately has a life on its own. The spider legs and cupcake holder were bought from Wilton, ordered through Amazon. Here's an important tip, put those eye candies last. I made a mistake of putting them onto my Oreos and into the fridge, when I took it out and it condenses, the eyes started to "bleed".  So I had to take out all of them eyes and re-attached new ones. It was a good thing I had enough. I suppose if you are having a Halloween party, it would be the effect you would have wanted. 

Ok, onto the next food item, Oreo spiders! This was technically not a baking project unless you count rolling fondant as baking! I saw this idea on Pinterest and wanted to try it out. Initially I had wanted to buy macarons so that I can have the desired colours but it was expensive and I had too much things to prepare on the morning of the party to go and collect them so I decided on Oreos instead!


We took a styrofoam board and cut out into 3 triangles and joint them together with duct tape and then used a blue paper that you can buy from your local craft store to wrap it up to form a pyramid.

On to the fun part.. we used melted chocolate to adhere the eye candies to the Oreos. Let me repeat, do not put them into the fridge, the eye candies will bleed after you take them out. Just let them dry naturally and store them in an airtight container.


Using rolled fondant and letting them harden first, we pry open the Oreos and stuck the rolled fondant in between. You can buy the double stuff Oreos for more space in between the Oreos.


Here's how they look. Aren't they adorable? You can use a toothpick to stick behind the Oreos and into the styrofoam pyramid board. If your paper, in my case, the blue paper, is a little bit thick, just use a needle to poke a hole first before sticking the toothpick with the attached Oreo in. I ended it by adhering a big spider on the top of the pyramid so that it looks like they are spiderlings following the big mama spider.

Heres the last and definitely not least, baking project for this party, his birthday cake! ok ok, the spider and cricket were plastics but everything else was baked and decorated by me and the hub.


Started off with basic chocolate cake and buttercream.


Used desiccated coconut and dyed it green, crushed Oreos and Digestive biscuits as soil and mud and fondant to create leaves and pebbles.


He loved his cake and in his eyes, I was probably the best baker in the world!

Ok, so much for baking! I've probably hit my baking quotient for the whole year! On to the goodie bag! It was a fortuitous encounter for me to chance upon the goodie bags in the exact colours that I wanted while searching for other party stuffs.


Here a quick look at what's inside the bags. There were drawing paper, spider "eggs", trading cards, pencils, matchboxes with spiders. :)


More close ups

Trading cards of his favourite arachnids!


Not sure if this is a universal culture but in days of old, kids used to catch spiders and put them in matchboxes. Not sure if our kids do that today(not mine), but the parents will surely appreciate this gesture.


I washi-taped the tip of the pencils so as to get the desired colours and hot-glued a spider on top!


I wanted to use green grapes originally which might have looked more authentic but I wanted to prepare these way before hand so they may not be as fresh so I figured Mentos mint sweets would work as well!

Colouring paper


These were printed on large sheets of white paper by a professional printer and I used my circle die cut to cut out the shapes. These were adhered to the front of the goodie bag.

On to the dessert plates! I love this! It's tedious and you only use it for a few minutes as you serve the cake before discarding but I love the effect!


Simply get your plastic dessert plate, punch 8 holes(4 on each side) on the opposite edge of the plate, cut out your pipe cleaners to desire length of spider legs and fastened them to the holes. Take your googly eyes and here's a faster way, get your double sided tape ready and simple stick the eyes onto the tape. Then cut out 2 eyes and adhere them to the top of the plate. 

The next one is the piñata. All the credit has to be given to the hub. He made it from scratch.

We had wanted to purchase a piñata but like I said in my previous post, it's difficult finding a non-Spiderman party stuffs so we couldn't find one. We then thought we'd just get something that was close to the shape of a spider perhaps even a circular one but it cost S$40 and wasn't ideal as well. In the end, we bought a paper lantern that cost S$2, some styrofoam for the head, some crepe paper and created our own. He watched Youtube and got some ideas from there.. 


Did you noticed we used a fly swatter for the piñata?? I mean, what else would you use to hit a creepy crawly? :)
In line with my hub's creativity, we want to do a wall that was worthy of photo-taking. To get one printed for our wall that was mighty big, it would have cost around S$200. So my ever genius hub took to the idea of creating web himself on the wall!


He used ribbons, white tack and a ladder to stick the ribbon around and on the wall! Love the effect! and big enough too to take group pictures. 


The only thing we bought was the hairy spider during Halloween! We had so much fun with the photo wall (can't quite call it a booth I suppose).


Stuck on the web!!
Goofing around with his creation
My hub also designed the backdrop of our dessert table and got it printed by a professional printer. These were decal stickers which he then stuck it on the wall himself.. The designs were the same theme as the invitation card.


On the dessert table, you will also find water bottles for the kids... 

as well as Kit Kats wrapped with our own customised labels. 


Next is the spider hats. I pre-folded and pre-cut the hats and paper legs. And at the party, the kids and mummies did some simple crafting to make a spider hat, 8 eyes and all!


spider crown
spider wiggly legs
I had around 30 kids so I had to fold (30 x 8 legs) 240 strips of paper spider legs! 


It was all worth it! They love it!

And I can't believe you've read it all the way to the end! Clap! Clap!  :)

Quite amazing we did so much by hand but we did enjoy ourselves although there were parts of the process where we thought we were actually going bonkers! haha.. But during and after the party, Ollie saw what we had done and was constantly thanking us and we were even elevated to the best mama and papa in the world status! Glad he was thankful for all that preparation.

So I hope you will find some useful tips here when you plan for your own party!


Happy birthday, sweetheart! We love you!